|
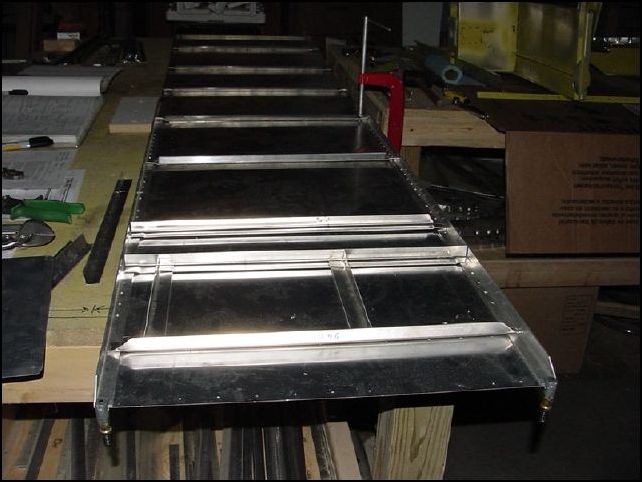
Note: The longerons I have clamped to the skin are not the correct ones, I just used them to space the Ls and Zs. This image is a rough layout of the left side skin. My skin was pre-punched at the factory. So I started by confirming the locations of the pre-punched holes to the drawings. Well, most of them are ok, but it looks like this skin was punched for the CH-2000 which does not have a rear seat. This means that the holes for my rear upright channel are punched incorrectly and I will have to figure out a way to correct this when I install that part.
|
![[First]](../images/bl_first.gif)
![[Prev]](../images/bl_prev.gif)
![[Home]](../images/bl_home.gif)
![[Index]](../images/bl_index.gif)
![[Next]](../images/bl_next.gif)
![[Last]](../images/bl_last.gif)